Free Flight Timer
The timer is intended to be used with free flight models FAI class F1A, F1B, F1C, F1H and F1Q.
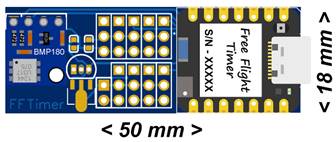
The hardware of the timer is an Seeed XIAO board and BMP180 pressure sensor. This makes the timer to be tiny and light.
The setting of the timer is through an Android app over Bluetooth connection.
Main futures are:
- 5 servos control (including the hook servo).
- Two switch input for hook position.
- RTD input (RTD must connect the input pin to ground).
- Flasher output.
- Altitude recording of one flight with interval of 0,2 sec. up to 1000 seconds. (Option)
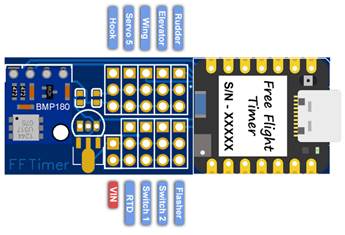
Timer with adapter plate with pins.

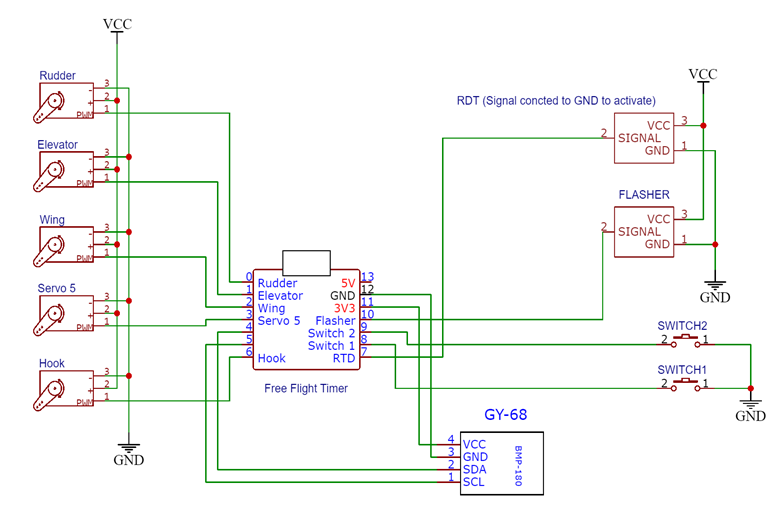
BMP180 sensor connection
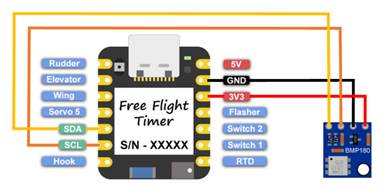
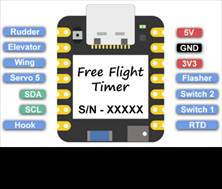
The connection diagram of the timer is shown on the picture below.
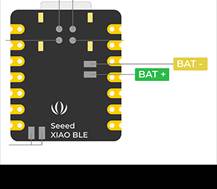
The timer can be powered with 5 volts on the 5V (max 5,5V) pin or with one cell LiPo battery on the pads on the back.
Don’t forget that the servos, RDT and flasher can draw high current, they must be powered directly by the battery. All GND must be connected between themselves. Be careful about the voltage limit, this board can be easily damaged with higher voltage.
I recommend for use of rectifier diode on 5v pin if you use 4 cell NiMh battery.
(The adapter plate for pin headers has a voltage regulator that allow using input voltage from 4V up to 13V. The servos are powered directly from the battery. The battery voltage must be compatible with the servos used.)
Free Flight Timer settings
To connect to the timer:
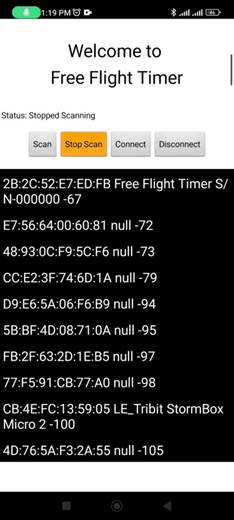
1. Open the android app Free Flight Timer.

2. Click the Scan button.
3. When you see your timer click Stop scan.
4. Select the timer and click the Connect button.

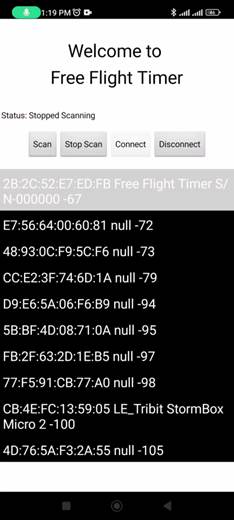
When the timer is connected two buttons will appear, Open settings and Plot Last Start.
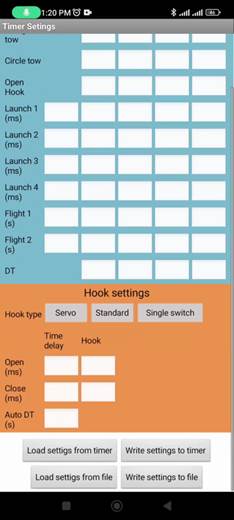
Click on Open settings and will take you to second screen with the timer settings. Here at the bottom you have 4 buttons:
1. Load settings from timer – will read the settings from the timer.
2. Write settings to timer – will write the new settings to the timer.
3. Load settings from file – you can safe one set of settings to the phone, with this button you can read the saved settings from the phone.
4. Save settings to file – save the settings to phone.

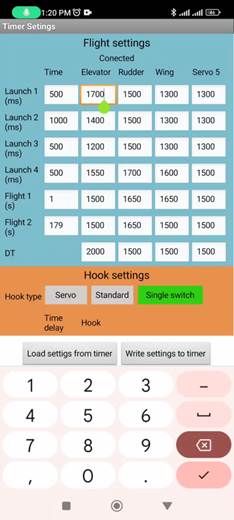
The values for the servo position are in μs (microseconds). Usually the PWM signal for the servo is between 800 and 2200 μs.
The time for the Launch sequences is in ms (milliseconds).
The time for the Flight sequences is in s (seconds).
You can use only whole numbers without decimal places.
There are three timer modes (Hook Type):

1. Servo hook (F1A/F1H) – in this mode you can choose the timing delay for opening and closing the hook. For proper functionality you must have delay for closing. The hook needs to have two switches, switch 1 for front position of the hook and switch 2 for opening.
- When switch 1 is closed the first time the timer will go to ready state and will close the hook.
- When both switches are open the timer is Circle tow.
- When switch 1 is closed timer is in Straight tow.
- When switch 2 is closed timer is in Open hook and the hook will open after Hook open delay (this can be zero).
- When switch 2 goes from closed to open but switch 1 stays in closed position timers returns to Straight tow and the hook closes after Hook close delay (you must have some delay if you want to have the option to close the hook again).
- When switch 2 goes from closed to open and switch 1 is open or goes to open before the Hook close delay time has passed, timer will go to Launch 1.
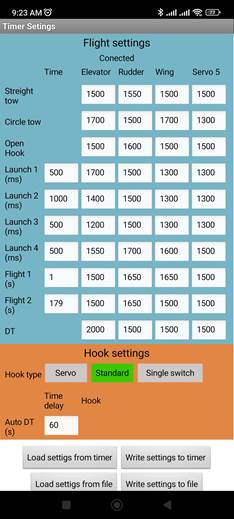
2. Standard hook (F1A/F1H) – in this mode the settings for the servo hook are not available. The hook needs to have two switches, switch 1 for front position of the hook and switch 2 for opening.
- When switch 1 is closed the first time the timer will go to ready state.
- When both switches are open the timer is Circle tow.
- When switch 1 is closed timer is in Straight tow.
- When switch 2 is closed timer is in Open.
- When switch 2 goes from closed and switch 1 is open or when it goes to open, timer will go to Launch 1. (switch 2 must stay closed)
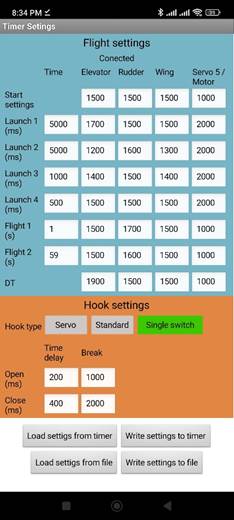
3. Single switch (F1B/F1C/F1Q) or (F1A/F1H with mechanical towing system) – in this mode the settings for the servo hook are used to control servo for a motor beak for F1Q, towing settings are not available.
- When you power up the timer it will move all servos as Start settings and will open the break servo (Hook servo)
- When switch 1 is closed the first time the timer will go to Launch 1 settings but timing will not start.
- When you release the switch 1 (open) the timer will start timing for Launch 1.
Using switch 2 for F1Q models,
- During Launch period (Launch 1 to Launch 4) if you close switch 2 (signal from energy limiter) the timer will go immediately to Flight 1 mode.
- In Flight mode the break servo will close after the set delay period.
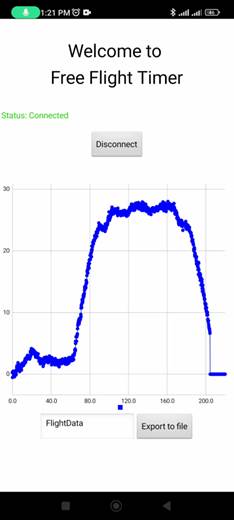
Plot the altitude for the last flight.
To save the altitude for the flight you need to activate the Switch 1 after the DT is activated. The Flasher will blink twice to confirm that the data is saved.
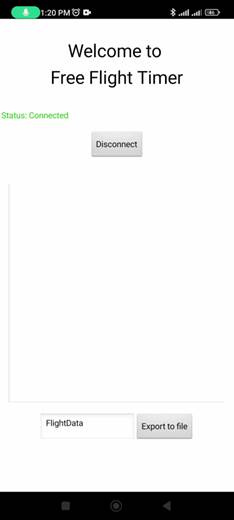
To plot the data click on the Plot Last Start.
Empty plot area will appear and the plot will be drawn.
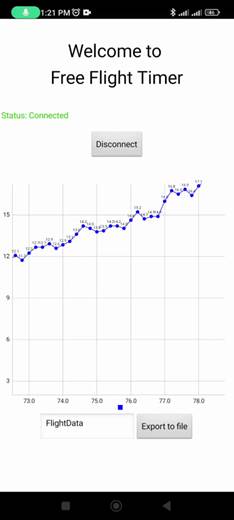
You can zoom the plot to read the altitude for every measurement.
There is also an option to export the data to a file on the phone. The file will be saved in the app folder of the phone, if you want to use it later. You will need to manipulate the data in some software like excel to be able to plot it.